my mother’s noodle pudding

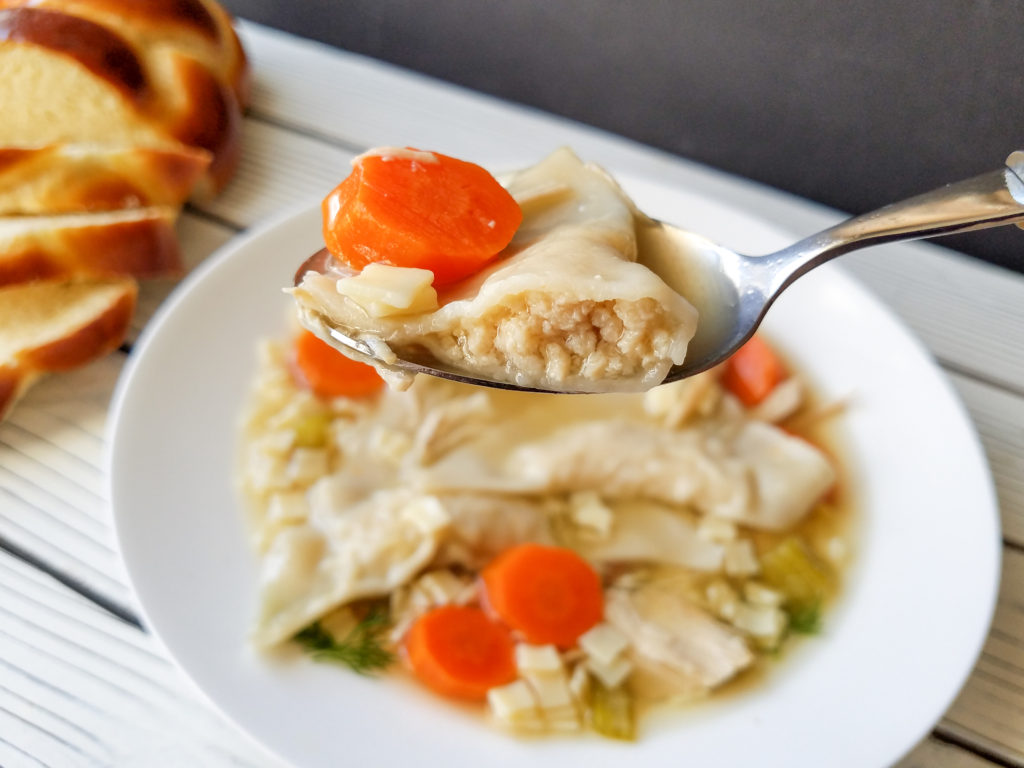
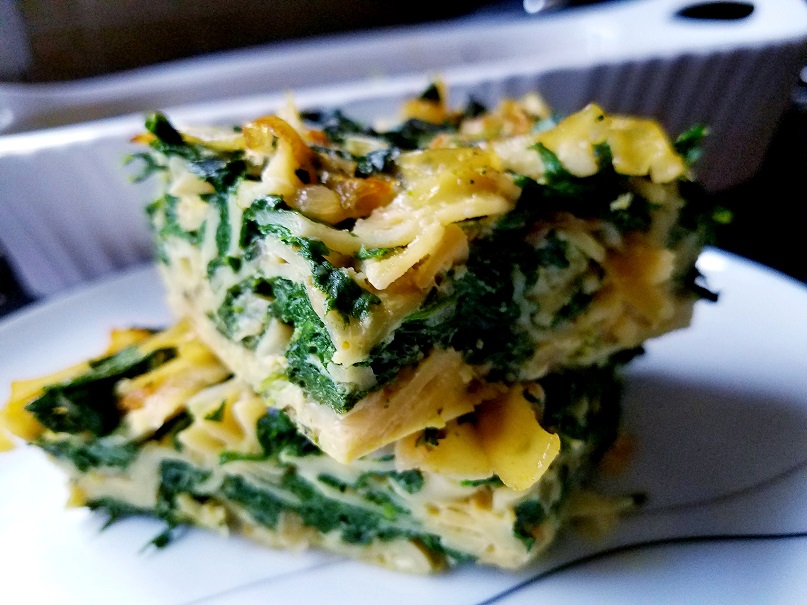
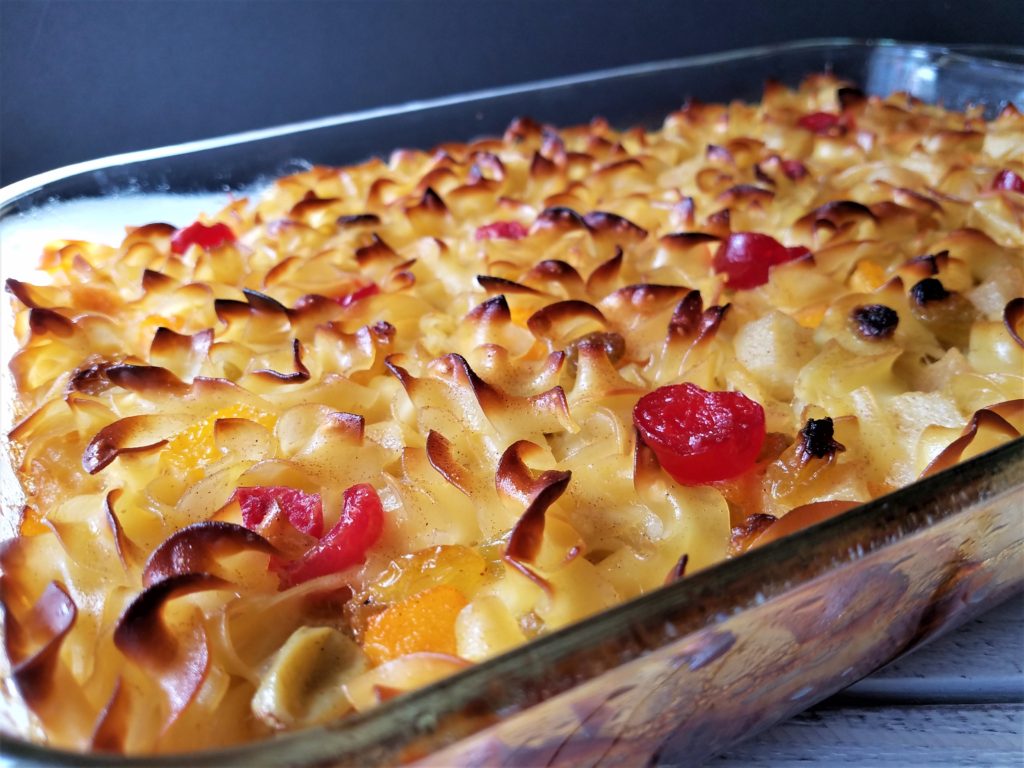
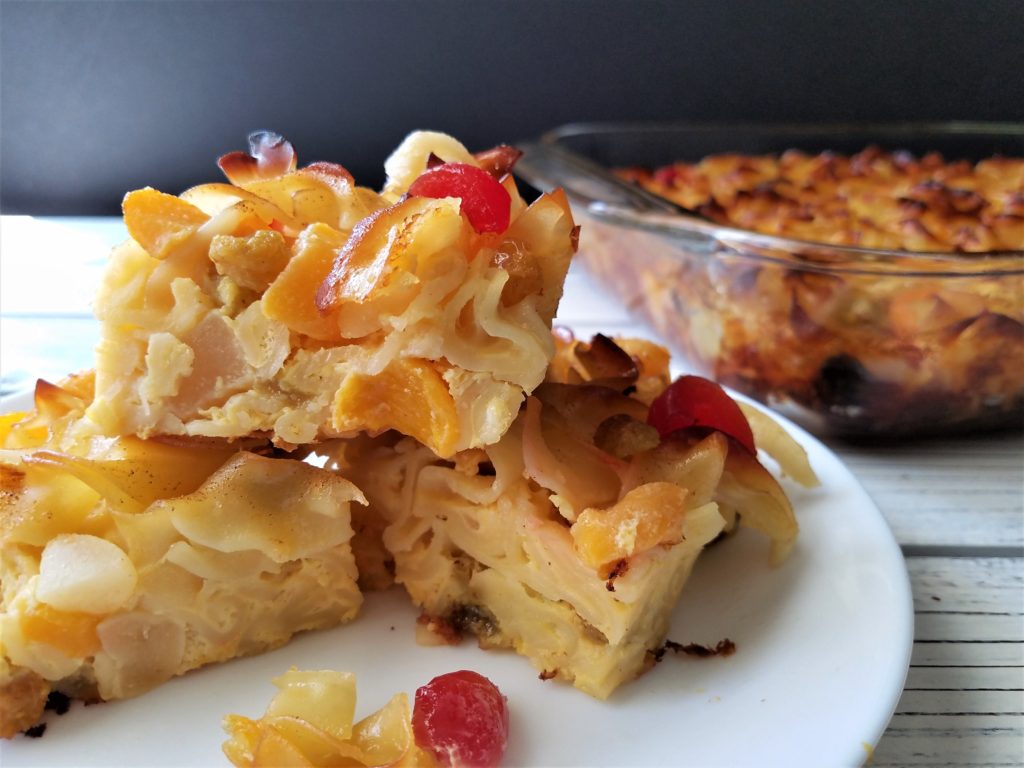
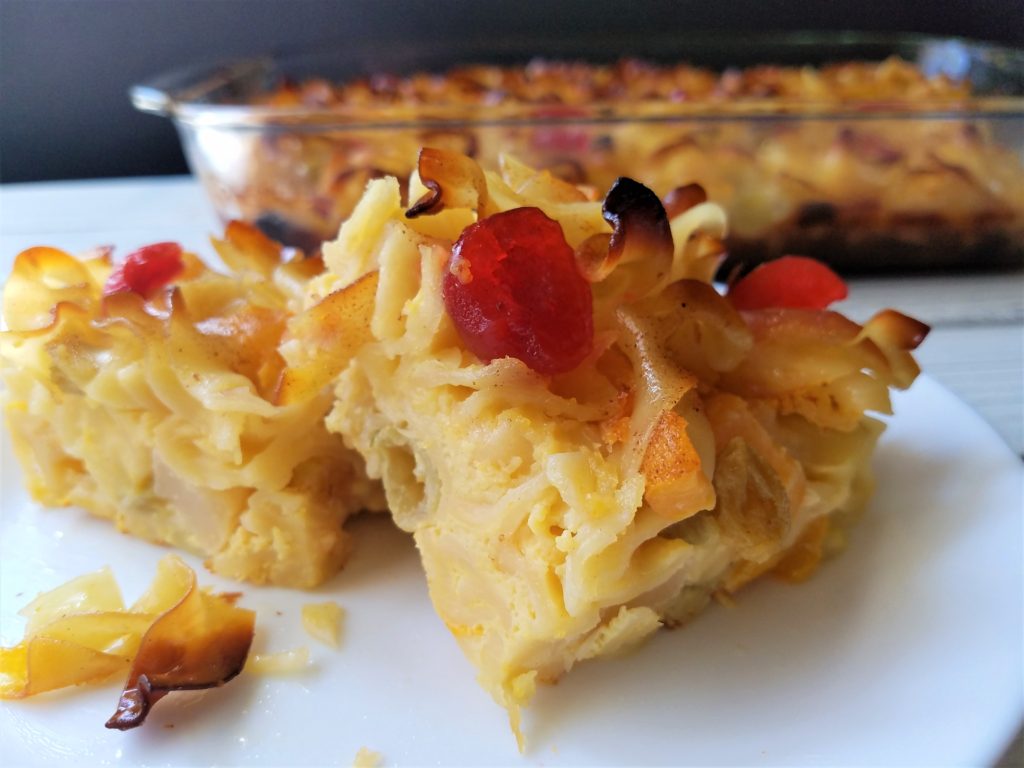
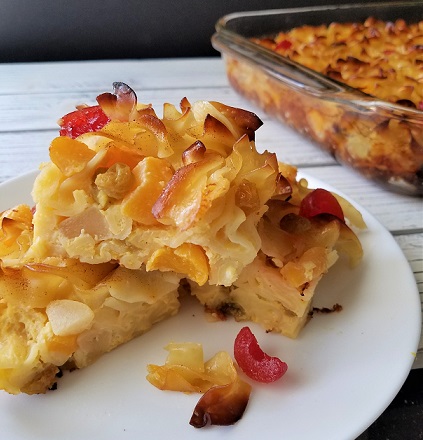
My mother’s noodle pudding was always my favorite part of our Friday night dinner. Noodle pudding, also called kugel, was a staple in our house that showed up once a week adorned one of two ways. This depended on the time she had and the ingredients on hand. One was her simple pudding with just noodles, eggs, sugar, cinnamon, and vanilla. The other was a bit fancier with what appeared to be little red jewels on top. The only difference between the two was the addition of raisins, a can of fruit cocktail, and the maraschino cherries she added in. If I asked enough times, she would add extra cherries on the top and tell me they were just for me! This one was my favorite.

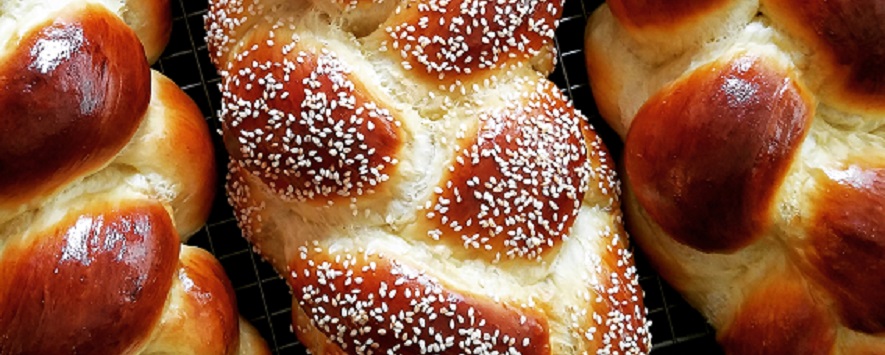
There are so many different versions and ways to make a noodle pudding. They can be savory or sweet and with or without fruit. They can be made with fine noodles or extra wide noodles. You can also add sour cream and cottage cheese to make a dairy noodle pudding. If I had to compare it to anything I would say it’s like a bread pudding but instead of using bread, we used noodles.

noodle pudding with fruit

When my youngest son was 3 years old, it was not only his absolute favorite thing to eat, but also one of the foods he associated with our Friday night Shabbos dinner. When it was time for the meal to be served he would cry out “newie, newie, newie” in excitement until a piece landed on his plate.  

One Friday I didn’t prepare it for dinner. That night he didn’t cry out “newie” he just cried! He cried so much I had to quickly whip one up and hold off dinner. No one should ever cry for a noodle pudding – especially not on my watch! After that night, we never had a Friday night dinner without it ever again!

Time has sure gone by fast. He is now home from college from what should be one of his lasts weeks as a senior. He has been home for a few weeks now and I’m finding it comforting yet bittersweet making my mother’s noodle pudding every Friday night again. Comforting because it brings back so many wonderful memories of when my children were small and also keeps my mother close in my heart. Bittersweet because I really wish things were back to normal and he was on campus with all of his friends where he belongs. Since he can’t be, the least I can do is to make sure my mother’s noodle pudding shows up on our Friday night table every week just as she always did. Shabbat Shalom and Enjoy!
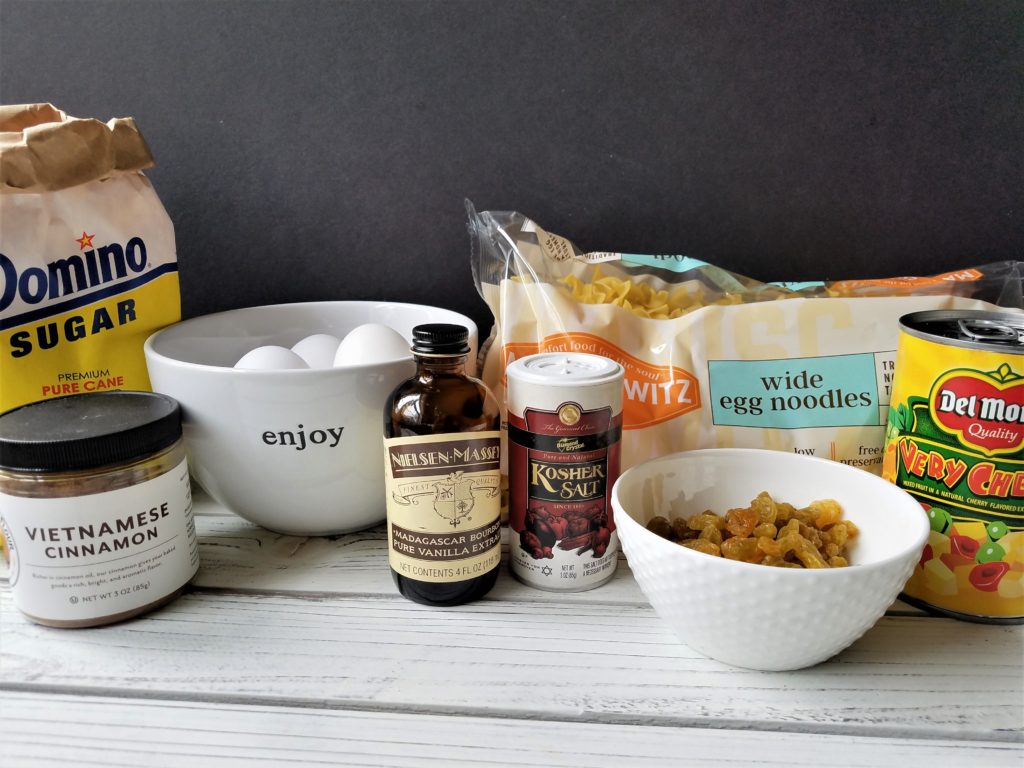
ingredients
1 package of wide or medium egg noodles
8 eggs
½ cup sugar
½ cup raisins (black or golden)
2 cans of fruit cocktail in juice drained (I like the very cherry of course)
2 teaspoon vanilla
1 ½ teaspoons salt (1 tsp. to boil the noodles, ½ tsp. for the pudding)
2 tablespoons vegetable or light olive oil divided (one for the pudding and one for the pan)
Cinnamon sugar
maraschino cherries (optional)

directions
Preheat the oven to 400 degrees.

Boil noodles as per directions on the package, adding 1 teaspoon of salt to the water. While the noodles are boiling, prepare the rest of the ingredients.

In a large bowl add the 8 eggs, sugar, vanilla, 1 tablespoon of oil and 1/2 teaspoon of salt; whisk until well blended.  Add in the raisins and fruit cocktail. When the noodles are done, rinse in cold water, drain well and add to the egg mixture. Mix together.

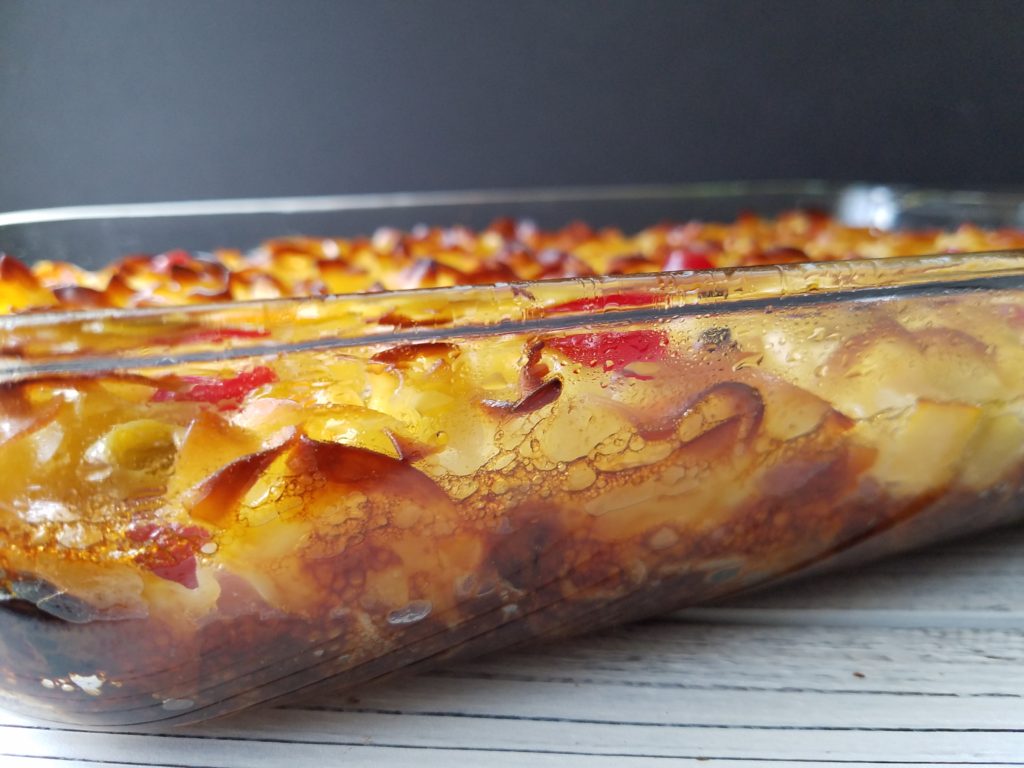
Oil a 9 x 13 casserole dish on the bottom and sides. Add the noodle mixture and smooth out the top with the back of a spoon. Make sure everything is well distributed. If adding the cherries, cut them in half and place on the top. Sprinkle the top with cinnamon sugar. Bake for about 40 to 45 minutes checking after 30. If it looks like it’s getting too brown, cover lightly with foil. I like to bake it just until barely set in the middle – it’s a bit more custardy that way.

ingredients for noodle pudding

easy homemade chicken kreplach

My easy homemade chicken kreplach recipe is here just in time for Purim but definitely something you’ll want to eat all year long! The Jewish holiday of Purim (which begins Monday night) commemorates the day Esther (Queen of Persia) saved the Jewish people from execution by Haman (advisor to the Persian King). During the holiday it’s customary to eat foods which look like the villain Haman’s triangular shaped hat or his ears! To learn more about the holiday check out one of my favorite websites My Jewish Learning https://www.myjewishlearning.com/article/purim-101/

If you are on Instagram or other social media, I’m sure you have been seeing a lot of photos and recipes of the ever popular hamantashen. Which I have also posted because, well, they are hamantashen and delicious! However, there are other traditional foods eaten during the holiday like kreplach, which sometimes go unnoticed. They are triangular shaped dumplings filled with ground meat or brisket. They can be simmered in chicken soup, or pan-fried with onions* and eaten as a main or side dish. I think it’s time to bring the kreplach front and center into the spotlight!

I’ll let you in on a little secret, I’ve always been TEAM KREPLACH! While I occasionally like a nice fluffy matzo ball in my chicken soup and of course noodles, I have always and will always be team kreplach! They are so yummy and delicious especially when they are lightened up with chicken and are a perfect addition to chicken soup. The filling is simple and so tasty and the wrapper becomes pillowy soft after it cooks in the soup.

Gefen wonton wrappers

To make it easy from the start, I use prepackaged wonton wrappers. These are simple to find in the grocery near the Asian food section. Usually it’s near the vegetables in a refrigerated case. If you can find the Gefen brand in your kosher market, I prefer them. Using premade wonton wrappers speeds up the process. The filling is a few simple ingredients most of which you already have in your pantry. It can’t get less complicated than that. Start to finish it takes about 2 hours to sauté the filling and fold the dumplings. If it seems overwhelming prepare the filling a day ahead of time and refridgerate. Day one cook the filling, day two fill the wontons, day three 40 kreplach waiting to be enjoyed!

So let’s stomp our feet, scream out, and make some noise for kreplach!  Who’s with me? Let’s get those groggers (noisemakers) shaking!  Enjoy!

ingredients
1 pound ground white meat chicken (or ground turkey)
1 small onion diced (about a cup of raw onion)
2 tablespoons olive oil
1 large garlic clove minced
1 large or extra-large egg
1 teaspoon salt
½ teaspoon pepper
1 package wonton skins

directions
Sauté the onion and garlic in oil with ½ teaspoon of salt. This should take about 10 to 15 minutes. When the onion is just starting to lightly brown, add in your ground chicken. Sauté the chicken until it is cooked through. Add remaining salt and pepper to taste. Chop it up a bit so there are no large burger sized pieces. Stir and set aside to cool.

When cool, add the mixture to a food processor fitted with the blade attachment and pulse about 10 times. Add the egg and pulse until it is ground. It should be the texture of small grains of rice. Not like baby food.

Line up your wonton wrappers a few at a time on a board. Wet the four sides of the wonton, add a teaspoon of the mixture to the middle and fold into a triangle. I try to press the chicken into the spoon so it’s compact. Then fold over into a triangle pressing the edges together very tightly and pushing the air out not letting any filling escape. 

Place them in a large container lined with a double layer of wax paper in between each layer. The recipe makes a lot but they freeze very well, and when ready to use they can be added to the soup frozen.

The other way I like to serve them is by pan frying* them in caramelized onions, then adding them to the pan to brown alongside. That’s the way my Bubbie (grandmother in Yiddish) made them.

*To pan fry them, sauté sliced onions in olive oil low and slow until caramelized and golden brown. Add the kreplach to the pan with the onions and pan fry until golden on the outside.

chicken kreplach soup

A big thank you goes out to my sister’s friend Amy. She gave me this recipe when I first moved to the Midwest and has become a staple in my house ever since!

oven baked potato latkes

We are coming up on the last couple of nights of Hanukkah and as I get ready to light candle number 7, I think it’s just about time for oven baked potato latkes. Actually it was time for oven baked latkes about 4 candles ago! Potato latkes (aka potato pancakes) and doughnuts are two treats we indulge in over the holiday. At Hanukkah, we keep the tradition of eating fried foods that reminds us of the miracle of the oil which lasted 8 nights.

In my house, it’s tradition to make fried potato latkes at least once during the eight days. They are so crispy on the outside and tender and creamy on the inside. But when I want to lighten things up and still indulge in the deliciousness of the holiday foods, I turn to baking instead of frying.

potato mixture

I know, you don’t think they are as good as fried, but these really are. When made in a hot oven on a hot pan, they come out just as crispy and delicious as the fried version. Plus, they are so much easier – you put them on a cookie sheet and into the oven and done. There is no standing over the frying pan waiting for them to be flipped and you won’t smell like latkes!

Ordinarily I make my mother’s recipe; it’s my go to especially when frying. However, when I’m baking them, I have been using a recipe which calls for parboiling the potatoes. It’s the perfect recipe when baking the latkes. It’s quick, easy, there is little mess, the potatoes don’t turn grey, and you don’t have to squeeze the water out of the potatoes. The best part is they have the same great taste and none of the guilt.

I adapted this recipe from Marcy Goldman which is very similar to my mom’s except for the parboiled potato. Parboiling them makes it easy to grate, and the skin slides off easily. This recipe is really a winner and everyone will love them. Serve with your favorite topping whether it’s sour cream, applesauce, or my new favorite, everything bagel seasoning mixed into sour cream!!!!!! YUM! The recipe makes approximately 24 latkes. Enjoy!

ingredients
1 and 3/4 pounds Yukon gold potatoes (or any potato you like)
1 medium onion, finely grated
4 extra-large eggs (large are fine too)
2 tablespoons flour (more if needed)
1 ½ teaspoons salt or to taste
½ to 1 teaspoon ground black pepper or to taste
¼ cup oil (I use extra light olive oil)
Toppings: apple sauce, sour cream, tzatziki dip, everything bagel seasoning, smoked salmon

directions
Place potatoes in a medium saucepan and just cover with cold water. Turn heat to high and allow to come to boil. As soon as potatoes are boiling, lower the heat to a simmer and set a timer for 10 minutes. After 10 minutes, remove the potatoes from stove, pour out the hot water and run cold water over them until the water remains cold. Let sit five minutes then dry the potatoes. The potatoes are still raw, but not quite.

They will be slightly softened, but still firm enough to produce distinct shreds. Leaving the skin on, use a hand grater and grate the potatoes into a large 5 quart bowl. You can also use a food processor fitted with a medium disc but I like to hand grate them. If the peel separates from the potato, discard it. If the peel gets grated in with the potatoes, it’s fine and just incorporate it into the mixture. The potatoes may feel a little bit gummy, but don’t worry about that.

Grate the onion into a bowl and drain the liquid. Add the onion, eggs, salt, and pepper into the grated potatoes then sprinkle in the flour and mix together. If the mixture seems loose, add another tablespoon of flour. To bake
Preheat the oven to 450 degrees. Pour the oil onto a rimmed baking sheet. When the oven comes to temperature, place the greased baking sheet into the oven for 5 to 10 minutes until the pan is hot. Using a towel or oven mitts, take the pan out, and quickly dollop the potato mixture onto the pan. I use a ¼ cup measure for each and gently press the tops down a little. Place in the oven for about 10 to 15 minutes. Take them out and turn them over then continue to bake until golden brown and crispy about another 10 minutes. Serve immediately with the topping of your choice. To reheat, place latkes on a large wire cake rack on a cookie sheet.

Happy Hanukkah!


Savory Spinach Noodle Kugel

This is the kind of post which you may want to read at night, because it could easily be a shot game! You know what I mean – right? Every time I say the word kugel, you take a shot of Manischewitz Concord Grape Wine!!!!!

(more…)

israeli couscous with Root Vegetables and my new Favorite Spice Baharat


Yes, I’m a copycat – but only when it comes to food! My Israeli couscous with root vegetables and my new favorite spice Baharat is case in point. It’s so delicious I can’t make it enough. So who am I copying you ask? There is a great vegetarian restaurant here in Columbus called Little Eater. To say I love the food there is an understatement. The flavor profiles they use are so creative and always delicious combinations you wouldn’t ordinarily expect. Among my favorites are the butternut squash and goat cheese sandwich with onion jam, the sweet potato soup, chocolate chip cookies, and this root vegetable couscous. I literally have cravings for it and decided I needed to make it at home.

Israeli couscous is pasta which is toasted instead of dried and it has a nice chew like orzo. It is sometimes called pearl couscous because it looks like little pearls which make it such a pretty addition to any meal or buffet table. It’s also a nice change from rice or potatoes. I add it on top of salads, serve it as a side, place a bed of it under fish, chicken, lamb or stew, or just eat in a bowl as a little nosh. The ratio of vegetables to couscous in this dish makes it very appealing. If you are trying to cut down carbs it’s a way more than 50/50 in favor of vegetables which you can see in the photo. Plus, it’s very quick and easy even with all vegetable dicing. Start to finish you will be done in less than an hour. Sounds good right?

I have to get off topic for a minute to share this tip with you… a few months ago I took a vegetable butchery class at Little Eater with the owner Cara Mangalini. She shared a wealth of knowledge on how to select, prepare, store, and cook vegetables. One of my favorite takeaways was the concept of using nut oils. She used walnut oil in one of the salads we sampled and you could taste something different which may not have been obvious, but it added something so special to the dish. I have just started to incorporate walnut and almond oil in some of my cooking as a finishing oil, or in dressing and strongly recommend you try it.

Another thing she suggested was to try new vegetables and prepare them in a way that is unexpected. Her couscous has rutabagas and currents which is an amazing combination. As much as I like them, unfortunately, I don’t think rutabagas like me very much. Given that I love parsnips (and they me!), I thought I would use them in my recipe. Plus, I think parsnips are an underappreciated vegetable so it’s time to give it a try if you haven’t already. As for the spice, that was easy. Since my trip to Israel last summer, one of my new favorite spices is Baharat* and I thought it would be a nice combination with the root vegetables because it has a nice warming flavor with notes of cinnamon. Baharat, which literally means spices, is an Israeli spice which if you think of as similar to pie spice with a kick and a little exotic, you’ll at least have a frame of reference.

When creating or recreating a recipe it’s always trial and error. I write down all of the ingredients, guess the ratio and give it a try. It took a few tries, but I just kept adding more and more vegetables until I came up with a version I absolutely love and think you will too. Of course, if you love rutabagas, swap them out with the parsnip.

Oh, and Cara, if you are reading this, Thank you for bringing your vegetable forward restaurant to Columbus! I’ll be in soon for another butternut squash sandwich and of course, a chocolate chip cookie. But I’ll be making my version of your couscous at home. Any Columbus peeps reading this, make a trip there, you’ll be glad you did! But in the meantime, go buy some Israeli couscous!  Enjoy!

Makes 8 to 10 side dish servings

Ingredients
1 ¼ pound carrots peeled and diced small ½”
1 ¼ pound parsnips peeled and diced small ½”
¾ cup whole roasted almonds chopped**
½ cup cranberries chopped
2 tablespoon extra-virgin olive oil
2 tablespoons freshly minced parsley
1 tablespoon fig balsamic vinegar (or other fruity balsamic)
1 teaspoon Baharat
1 teaspoon salt
½ teaspoon black pepper
For the couscous:
1 cup dry Israeli couscous (also called pearl couscous)
1 and 1/2 cups water
2 teaspoons olive oil
½ teaspoon salt

Heat your oven to 425 degrees. Dice all of your vegetables into a small dice and place into a 5qt bowl. Drizzle with olive oil, sprinkle with salt and pepper and toss to coat. Place on 2 sheet pans. When roasting, never crowd the pan as the vegetables will steam instead of roasting. Place in the oven for 20 to 30 minutes checking on them after 10 minutes and toss them around. You want them to lightly roast but still have a little bite to them.

While the vegetables are roasting prepare the couscous: In a small pot, bring 1 ½ cups of water to a boil with ½ teaspoon salt.  While waiting for the water to boil, heat 2 teaspoons of olive oil on medium-low heat in a 3 quart saucepan. Add the dry couscous and stir around to coat in the olive oil. Allow to cook for about 5 minutes to lightly toast the couscous. Add the boiling water to the couscous very slowly and cover the pot. Cook for 10 minutes, or until the water is absorbed, and the pearls are tender.

While everything is roasting and boiling: Chop the almonds and set aside. Chop the cranberries and set aside. Mince the parsley and set aside.

When the vegetables are ready it’s time to assemble everything. Into a large bowl, add the couscous and vegetables (use a spatula and try to get some of the roasting oil as well), parsley, cranberries, almonds, Baharat, balsamic and toss. Taste for seasoning and adjust to your liking.

*If you click on the word Baharat anywhere in this post it will take you to a website which has some history, cooking tips, and different spice combinations of Baharat. I brought some back from Israel with me, but have also found it at a couple of local groceries, World Market and Whole Foods. Each one tastes a little different, but of the 4 I have tried, all were very good – just different.

**Toasting almonds (or any nut) is very easy. Preheat your oven to 300 degrees. Put the almonds on a sheet pan and place in the center of your oven for about 5 to 10 minutes. Once you start to smell them, they are done. Make sure to keep an eye on them. You can also buy them already roasted.