Popovers with Strawberry Butter

SONY DSC

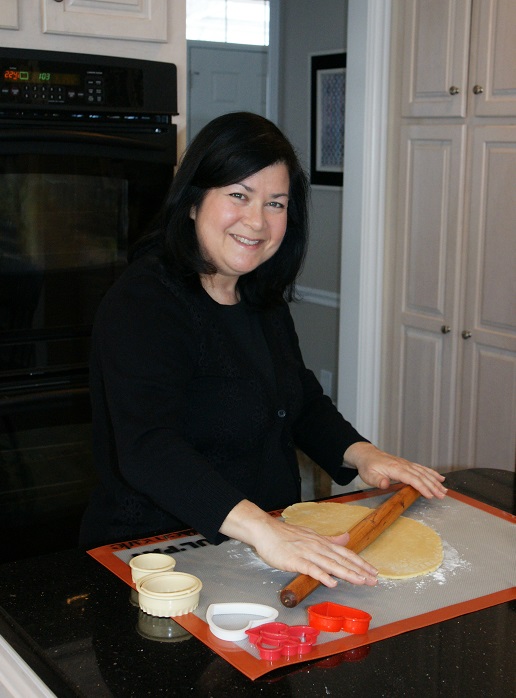
How lucky can a girl get when her husband and son wake up early on Mother’s day to make delicious popovers? Pretty lucky, especially since I love popovers. I wouldn’t say they are my favorite breakfast, but they’re right up there with the best of them. Growing up, my mother would take my sister and I to Neiman Marcus department store for lunch. That’s where I ate my first popover. They were served with softened butter and warm jam, it was such a treat to go there for a ladies lunch and have them. When my sister Rochelle came to visit us in Florida we always went there for lunch, she loved it. For days after my mother would talk about their delicious popovers; they’re so crusty yet soft inside, how do they get that way, they must be difficult to make. Then one day we decided to make them. I was taking home economics in high school and there was a recipe for popovers in the cookbook I had. Imagine, a plain old Betty Crocker cookbook could have such a fantastic recipe. It was only 5 ingredients and we thought how easy is that, let’s try it? Turns out, they were easy and so delicious. They became our special occasion breakfast. For my birthday this past summer, my son’s Jarred and Ethan made them for me on my birthday for breakfast. I’m glad they remembered to make them for me today as well. As my mother always said, everyday is mother’s day so enjoy yours with this special treat!

2 large or extra-large eggs*
1 cup all-purpose flour
1 cup milk at room temperature 
1 tablespoon butter melted (plus extra to grease the muffin tins)
½ teaspoon salt

Preheat oven to 450 degrees.

Generously butter 6 muffin tins or six 5 ounce custard cups and set aside on a cookie sheet.

In a blender or with a mixer blend the eggs, milk, butter and salt. Blend just until mixed. Add the flour and blend on low just until smooth. Do not over beat.

Fill muffin tins ¾ full or if using custard cups about ½ full and bake for 20  minutes then lower the temperature to 400 degrees and bake about 10 to 15 minutes longer or until a deep golden brown. Keep an eye on them. If they get too brown on top, cover lightly with foil. Immediately remove from cups and serve.

You can serve them with butter or your favorite jam. Another delicious way to enjoy them is by making your own strawberry butter. There are a few recipes out there that add confectioner sugar to the butter and jam mixture. I find that too sweet and make it the way a restaurant in NYC taught me (coincidentally it was my first mother’s day). We went to a restaurant called Coconut Grill on the upper east side of Manhattan. Jarred was only about one month old and we were so tired we couldn’t even remember when we ate last. They put a basket of Irish soda bread on the table with a little cup of strawberry butter. It was the most delicious thing I ever tasted. The waiter was so nice he gave us the recipe.

1/2 pound (1 stick) of unsalted butter at room temperature
1/2 cup strawberry jam (or your favorite jam, berry jams work the best)

With a hand mixer whip the butter until smooth. Add the jam and incorporate just till mixed lightly. It’s okay if the butter has streaks of jam. It couldn’t be any easier then that!

SONY DSC

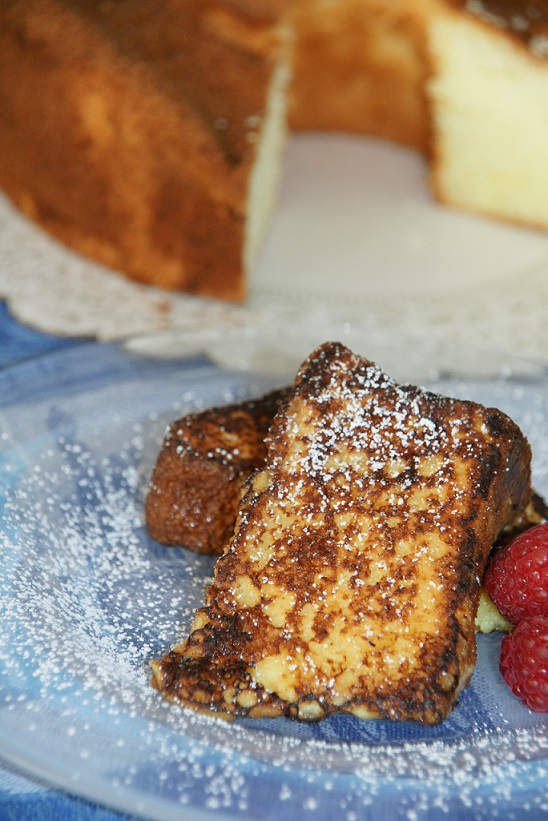
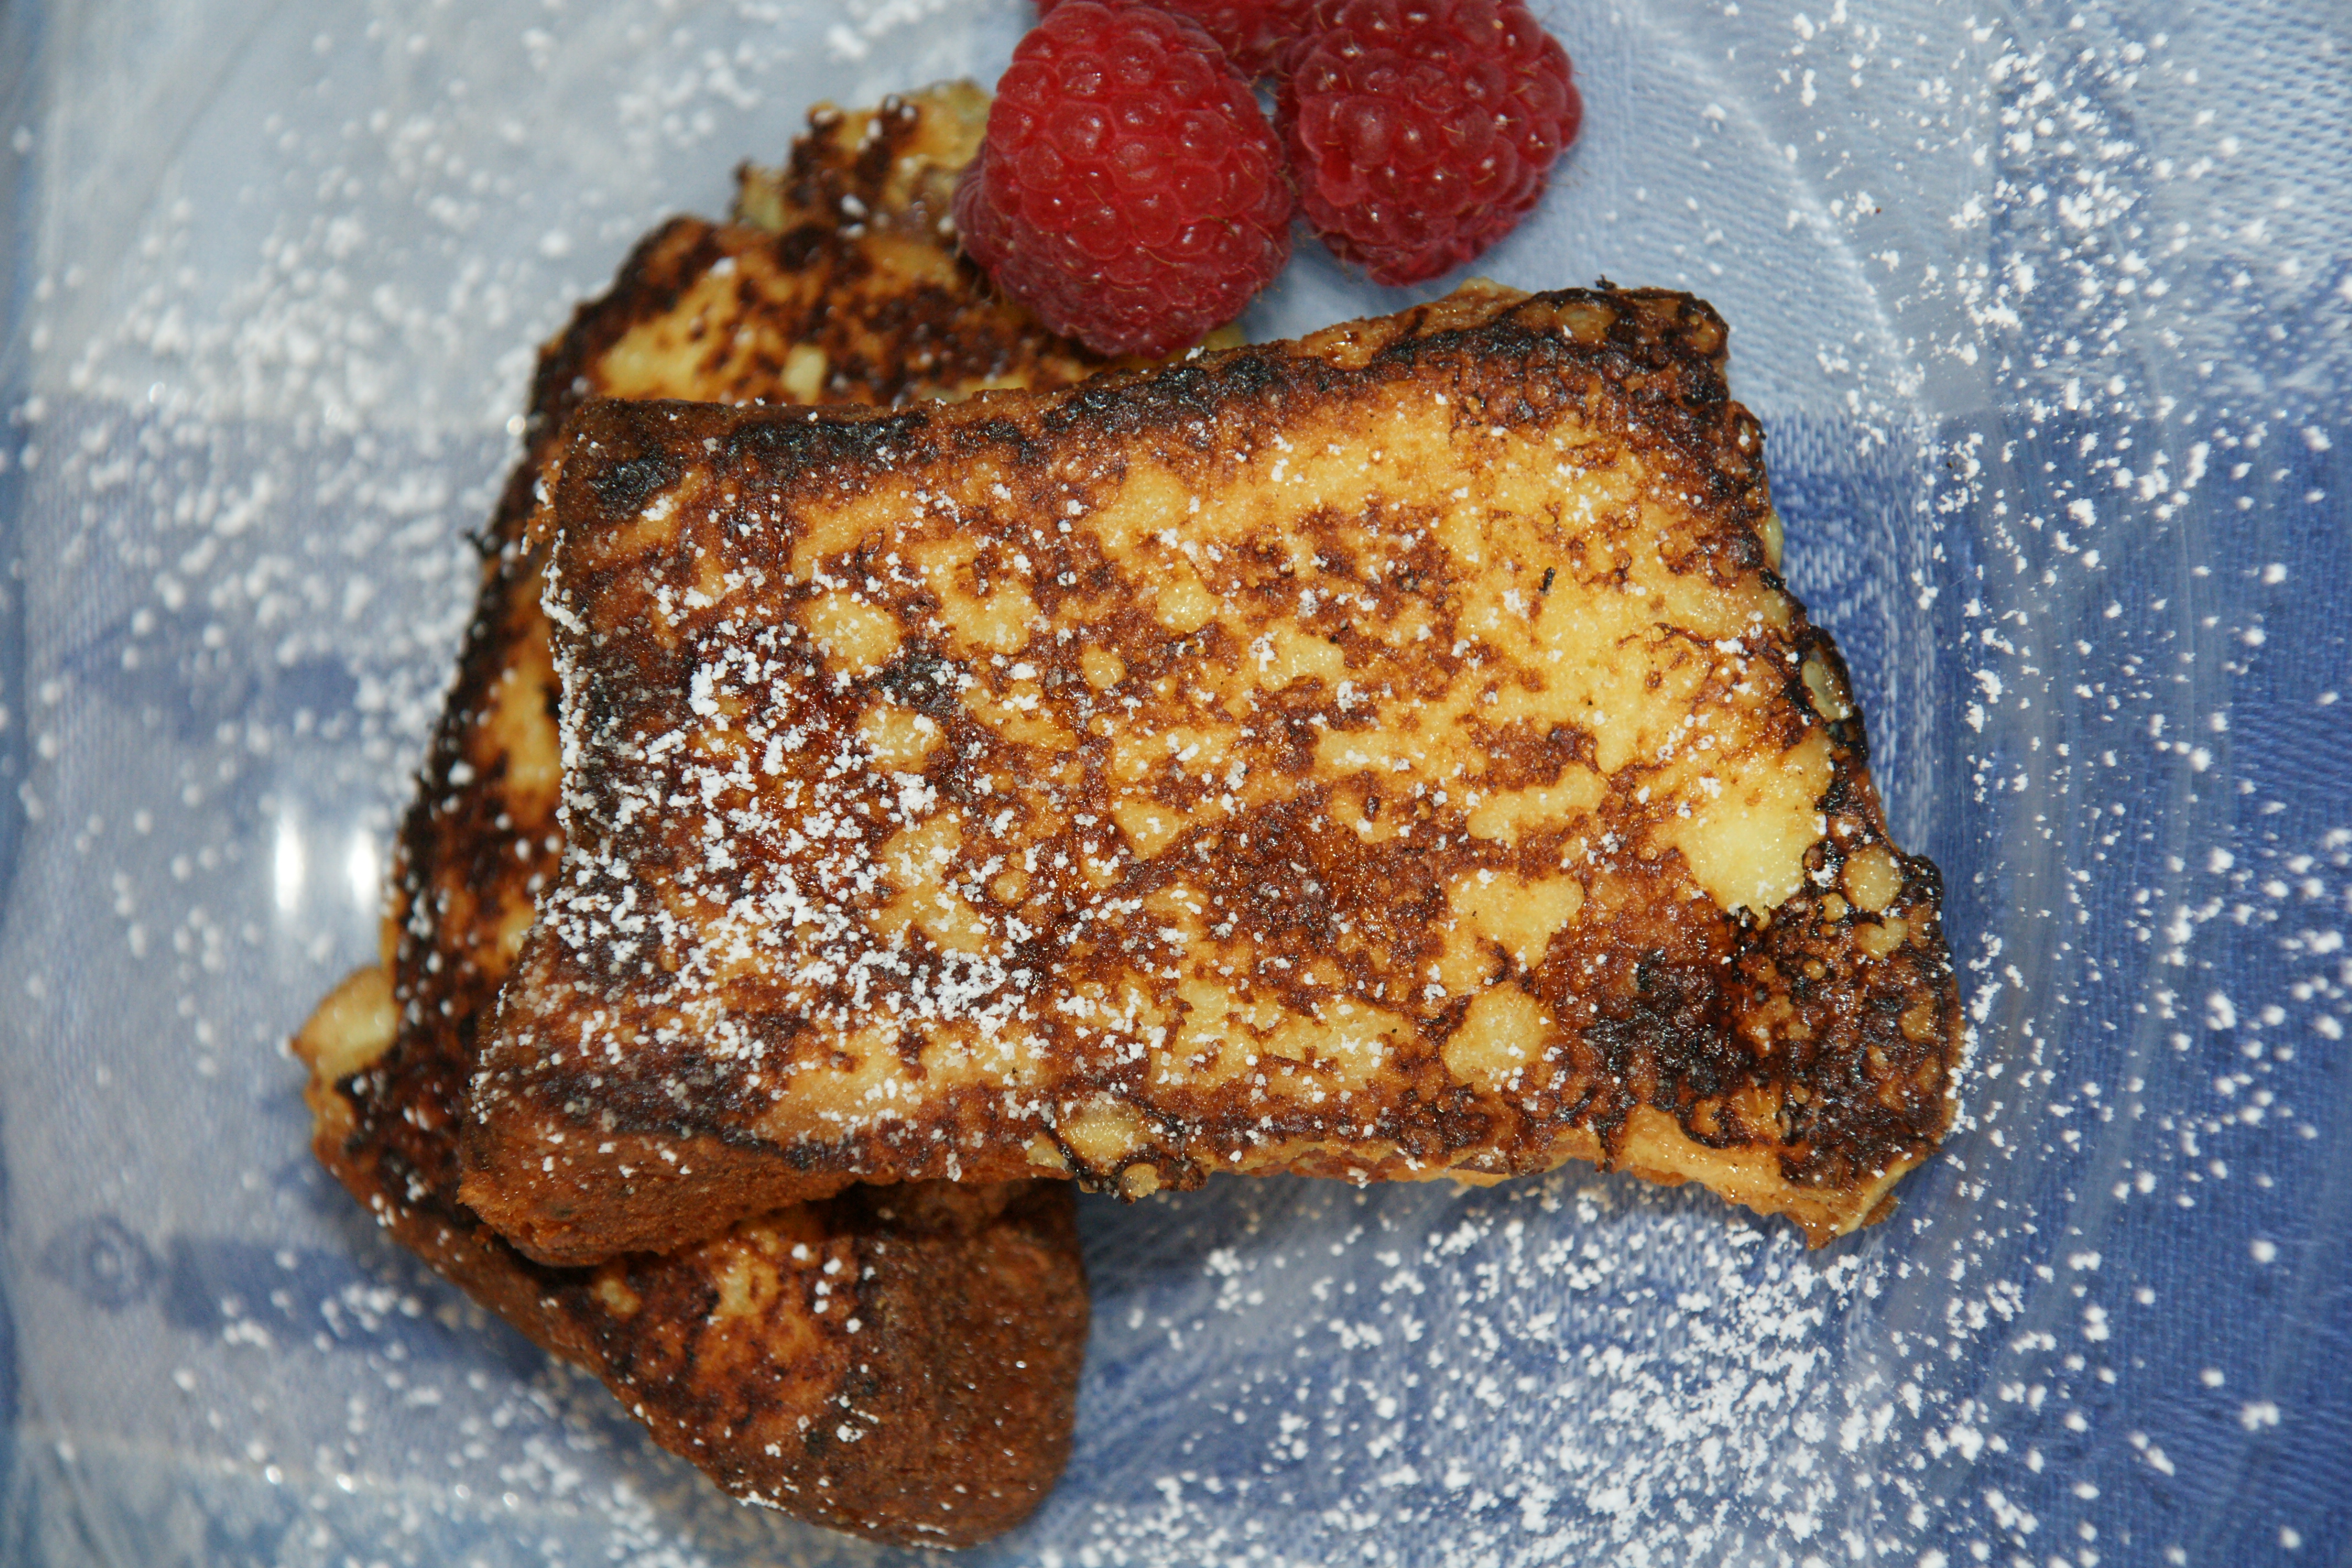
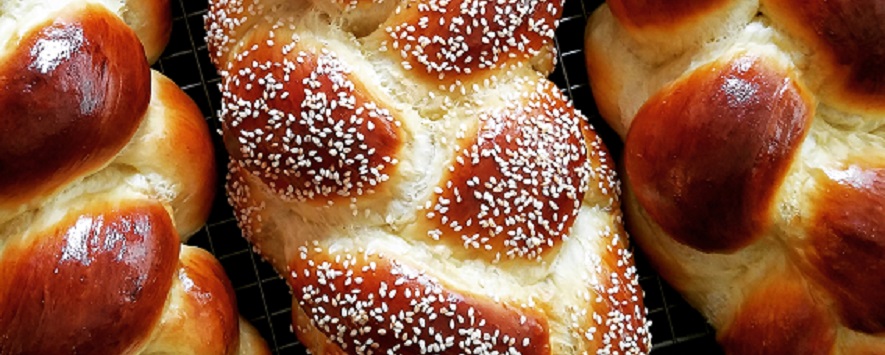
I took a bunch of photos of my son while mixing the batter but found out I didn’t have a chip in my camera!  How ridiculous is that? UGH!  So here is the beautiful finished product. Crisp and golden on the outside and soft and moist on the inside. So yummy!

*I always bake with extra-large eggs. Subbing large will work fine too.

Happy Mother’s Day! Cooking with my Mother

SONY DSC
Sherri Lerner Glickstein happily baking in her Ohio kitchen in 2014!
Autosave-File vom d-lab2/3 der AgfaPhoto GmbH
Edith Goodman Lerner happily baking in her Florida kitchen in 1994

Quite a resemblance right? I was told my whole like that I looked just like my mother. Even as I walked down the aisle at my wedding I heard a cousin say “oh my God, she looks just like Edie” and she was right, I did. My mother passed away April 7, 1997. I miss her every single day. She is the woman who gave me my beginning in life. She is the one who slept in my room after watching the scary movie Carrie with Sissy Spacek. She is the one who went out with me on a Saturday night when I didn’t have a date. She is the person I spoke to 10 times a day after I had gave birth. She is the person who sang to my son Jarred on the phone so that I could take a shower! She is the reason I love to bake and cook. That was her passion, her calling. If she couldn’t sleep at night, she would wake up and bake something! Who does that at 3 o’clock in the morning? I am proud to say my mother did, that’s who!

My blog is dedicated to my mother “Edie” and her passion for cooking which I luckily inherited. I recently wrote a cookbook for my niece that included many of her recipes and gave it to her at her bridal shower. When I got married 23 years ago (this coming May 23rd is my anniversary 23/23) she hand wrote me a small cookbook that included about a dozen recipes. Being newly married, I often called her for cooking advice and recipes and as she gave them to me I would type them up and glue them into the back of the book. She didn’t work off a recipe, it was all in her head so I’m glad I took the time to do that. I encourage you to do that as well sooner then later if you haven’t already. Being a graphic designer, I didn’t stop there. I decided to document as many of her recipes as possible and make little cookbooks for her and my sisters. That was 20 years ago so I thought how wonderful to create her recipes, photograph them and write a cookbook.

SCAN0013
My wedding day… May 23, 1991

Fast forward 23 years and what started out as what I thought would be 20 or so recipes ended up including 70 recipes in a 134 page book with more waiting to be included. The odd thing is that there were originally 71 recipes in the book but one of them gave me such a difficult time and kept making all the other pages re-wrap so I omitted the recipe and figured I would add it back when I finish it this summer. It’s odd because my mother passed away at the age of 71 and I didn’t set out to include a particular number of recipes. It just happened organically. I’m sure this was her way of making sure I would have to keep writing.

SONY DSCSONY DSC

First off, how beautiful is my niece? She was so happy that day, as she is everyday. The book I ended up giving her is only a draft as I had so many more things to include and honestly, you can’t write a book in 4 months without having to fix a few things. Plus, there are more stories and recipes waiting to be written. She was expecting a little cookbook that I made 20 years ago. When she opened it, her eyes filled with tears. At the last minute I put my parents wedding photo on the back cover; it was the perfect ending. This is the book that got me started on writing a blog. I enjoyed writing stories about her recipes, our family and her. She was a very funny lady. You never really knew if she realized that or not. She had an enormous database of funny sayings and idioms that when writing the book found that they were unique to her.

Researching where or why she made them opened dialog with my sisters; both excellent cooks by the way! We reminisced about so much. It turns out I’m the keeper of the flame, like my mother, I just love to cook. I cooked each of the recipes and took photos of them. Of course I found out that I should have taken them vertically, but live and learn! I realized that even though she wrote them down, her measurements weren’t always correct so I had to tweak them a little. It was a learning process and spiritually connected to her on a whole different level. A lot of her recipes left me questioning. Why did she rewrite them so many times? Why did she rename the same recipe? Where is her recipe for beef stew? And why after 2 tries already doesn’t her cookie pie crust turn out well? All the questions have me searching for my own cooking voice.

My mother ended every written recipe with the simple word “Enjoy” that’s all she wanted. She wanted you to just enjoy! Enjoy her cooking, Enjoy her baking, Enjoy life! She didn’t believe in what she called Hallmark card holidays. She said everyday is mother’s day and everyday is children’s day; life is too short to celebrate only one day a year. So today on the official Mother’s Day, whether you are a mother, grandmother, or great grandmother, take this day and Enjoy! Thanks mom, I love you.


Happy Cinco de Mayo! Celebrate with fish tacos!

5.14_Website_Event_Image-Cinco-de-Mayo

So, I’m a day late and a dollar short. Yesterday was Cinco de Mayo. Usually that means my boys come home from school and tell me they have to bake something for Spanish class. Oh, and did I mention they usually need it the next day! So being the girl scout that I am and always prepared, I generally have all the ingredients to make any variety of food (well most foods anyway)! The good news is that my boys help out, especially since we always make desserts. Jarred genuinely likes to cook and Ethan likes to lick the bowl!

This year as May 5th approached I asked my younger son Ethan what he wanted to bring in to school. He said the teacher didn’t ask the class for anything –  I was shocked yet at the same time being in the throws of baseball season very relieved. Over the past 6 years I have been in my kitchen making: Mexican wedding cookies, horchata or Arroz con leche (rice pudding), flan (Mexican custard), dulce de leche (caramel), churros, oh and let’s not forget to send in Mexican hot chocolate, and cafe con leche to wash it all down! Last year I made bridagderos (a chocolate candy that is a cross between fudge and a truffle) stay tuned for that recipe, it’s delicious although technically wasn’t considered Spanish for the class since it’s Brazilian! As you can see, I’m not the grab a bag of chips and salsa to bring in kind of mom! This year I was planning to make paletas (frozen popsicles) that I saw on the Food Network. I might just have to make those sometime this summer.

Since it is a baseball night, I had to make a fast dinner so I decided to prepare a make your own taco or burrito bar. Being short on time, I purchased flour tortillas, guacamole and cuban black beans from Trader Joe. They have the best homemade flour tortillas! Salsa is another story entirely and I should probably have a post dedicated the the brands I have tried. So for tonight, any jar of salsa you have in your house will be great – remember, short on time.

To set up the buffet, you’ll need a main protein (in my case grilled tilapia) toppings of your choice, shredded lettuce, salsa, guacamole, rice, corn, black beans, tortilla chips and shredded cheese.

SONY DSC

For the recipes… roasted corn and onions, grilled tilapia, brown rice.

Taco Spiced Tilapia
3 to 4 tilapia filets (account for 1 piece of fish per person)
Penzey’s taco seasoning (or brand of your choice)
1 tablespoon olive oil

Put a non-stick grill pan on the stove top on medium heat. Meanwhile prepare the fish. Rub both sides with olive oil and sprinkle the top with taco seasoning. When the pan is hot, place the fish seasoned side down. Sprinkle the other side with a little more seasoning. Grill until done about 5 minutes a side depending on how thick your fish is.

SONY DSC

Roasted Corn Recipe

There is a restaurant in NYC called Canyon Road. They make a roasted corn dish that is to die for. In the summer, I roast my own corn on the grill but for a nice shortcut, Trader Joe has roasted corn in the freezer section. How easy is that? It’s made with caramelized onions and very deliscious, I hope you like it.


one onion finely diced
4 garlic cloves minced
1/2 bag frozen roasted corn from you guessed it… Trader Joe!
salt and pepper to taste (I used 1/2 teaspoon of each)

In a large skillet heat 2 tbs. olive oil over medium heat. Add the onions and cook over medium to low heat for about 15 to 20 minutes until they are nice and caramelized. Add the garlic and cook for a couple of minutes then add the corn. Cook until the corn is hot, add salt and pepper to taste.

SONY DSC

Chipotle Restaurant Style Rice
2 cups of water
1 cup brown rice
1 small shallot diced fine
2 tablespoons dried cilantro or parsely (or combination)
2 teaspoons of olive oil
2 teaspoons zesty lemon seasoning
1 teaspoon lemon pepper seasoning (no salt added)

In a 2 quart saucepan add the water and bring to a boil. When it comes to a boil, add the rice and the rest of the ingredients and stir. Cover and cook as directed on the package.

Ole!

According to the Encyclopedia Britannica…

Cinco de Mayo, ( Spanish: “Fifth of May”) , also known as the Anniversary of the Battle of Puebla,  national holiday in Mexico in honor of a military victory in 1862 over the French forces of Napoleon III. When in 1861 Mexico declared a temporary moratorium on the repayment of foreign debts, English, Spanish, and French troops invaded the country. 

Tomato Soup and Roasted Garlic Grilled Cheese Sandwiches with Surprise Croutons

SONY DSC

Is there anything more comforting then a warm bowl of soup on a cold winter day? Apparently, a warm bowl of soup on a cold spring day! This winter seems to be cutting into spring big time and quite frankly I’m getting a little tired of it, as are most people. The only good thing about it is that it lengthens the time we can enjoy a nice hot bowl of soup. And, since it rains in Ohio 10 to 14 days a month on average, soup is a big go-to for me. I will probably add a subtitle “soups” at some point because I do make quite a few of them. Throughout the fall and winter I make chicken soup almost every week. Then there is vegetable soup, carrot and parsnip soup, butternut squash soup, lentil soup, split pea soup, potato leek, onion soup, hot and sour soup (shout out to my sister-in-law Barbara for that one), velvet chicken and corn soup, mushroom barley soup, and in the summer, gazpacho and chilled fruit soups! Tonight it was so cold, it felt like a tomato soup kind of night. Since I had a loaf of roasted garlic bread in the house, what better to go along side than a delicious gooey grilled cheese? This recipe is loosely based on Barefoot Contessa’s easy tomato soup & grilled cheese croutons (how clever is that?) but with a Splash of Sherri and much less fat! This recipe makes 4 to 6 servings.

SONY DSC

2 sweet onions diced
3 tablespoons extra virgin olive oil
6 cloves of garlic peeled and minced
4 cups vegetable stock (store bought is fine for this)
2 (28 ounce) cans San Marzano tomatoes
1 pint cherry tomatoes or any mix of fresh tomatoes
2 bay leaves
1 teaspoon sugar
1 to 2 teaspoons sea salt (season to taste)
1/2 to 1 teaspoon black pepper (season to taste)

Grilled cheese recipe follows at the end

Preheat oven to 450 degrees.

Wash a pint of tomatoes, core and cut in half. Place on a small baking sheet and drizzle with one tablespoon of olive oil and a pinch of salt, toss to coat. Roast in the oven for about 20 minute or until the tomatoes start to have a nice light charred look to them. I roasted a pint of mini heirloom tomatoes in my toaster oven. They added such a wonderful flavor to the soup. If you can find them, I highly recommend them.

Meanwhile, in a large pot heat 2 tbs. olive oil over medium heat. Add the onions and cook over medium to low heat for about 15 to 20 minutes until they are nice and caramelized.* Add the garlic and cook for a couple of minutes, stir in the vegetable stock, can of tomatoes, roasted tomatoes, bay leaf, sugar, salt and pepper.. Bring the soup to a light boil, then lower the heat and simmer for about 15 to 20 minutes. Use and immersion blender to puree the soup until smooth.

* I use the Arthur Schwartz method of caramelizing onions. After you place them in the pot, cover them for 10 minutes stirring every 3 minutes or so. Then uncover them and cook another 10 to 15 minutes stirring occasionally, until they become nice and golden brown. See my post on how to caramelize onions in my favorite things category.

SONY DSC

Grilled cheese sandwiches for 3 people plus one extra to cut into croutons:

8 slices Roasted garlic bread sliced into 1/2 inch slices (or the bread of your choice)
1 cup good quality lowfat cheddar cheese shredded
olive oil to brush the bread

Heat a griddle or panini pan. Place 4 slices of bread on a cutting board and lightly brush with olive oil. Usually grilled cheese is made by buttering the bread but I prefer the taste of olive oil and it’s healthier. Place them oiled side down in the pan. Top each slice with 1/4 cup of cheese. Place remaining slices of bread on top and lightly brush with olive oil.

Grill the sandwiches for about 4 minutes a side, or until nicely browned. Place on a cutting board and allow them to rest for about a minute before slicing in half. Slice 3 of the sandwiches in half. The extra sandwich, cut into 1 inch cubes and place in a bowl  to be used as croutons. Enjoy!

Passover French Toast

SONY DSC

After day 4 or 5 of Passover, the novelty of having matzoh for breakfast starts to wear off. My boys have had their fill of Tam Tam crackers with cream cheese, cream cheese and jelly on matzoh, matzoh pizza, matzoh rolls, and matzoh brei. Sometimes we have cheese blintzes for breakfast or even left over farfel mac and cheese to take a break. While I love matzoh, it doesn’t really love me so I’m a fruit and eggs girl in the mornings. If you keep Passover, you know what I’m talking about. The first couple of days, you can’t get enough because it’s so good. But then, you start to miss whatever your usual breakfast is.

A few years ago I had a lot of sponge cake in my house. My sister bought me 2 loaves and I bought 2 loaves so there was an abundance in my house. During the holiday I use the sponge cake as if it were bread for sandwiches and wondered how it would hold up as French toast. So I tried it and it held up great! It’s a little bit more delicate then using regular bread, it is cake after all so handle it carefully. Here you have it, Passover French toast… Enjoy! I’d love it if you would let me know how it turned out.

This recipe is for 2 servings

4 slices of sponge cake cut into 1″ slices
2/3 cup fat free milk
1 extra large egg
1 teaspoon kosher for Passover vanilla or almond extract
butter for the pan
Put a medium size frying pan on the stove. Set the heat to medium/high and place about 2 teaspoons of butter in the pan. Slice the sponge cake and set aside.

While the pan is heating up, whisk the egg, milk and extract in a medium size bowl. Dip the slices of sponge cake into the egg mixture. Don’t let it soak, just dip one side, then flip to the other and place in the pan. The sponge cake (hence it’s name) is like a sponge and will soak up the mixture pretty quickly. It’s much more delicate then a regular slice of bread so handle it gingerly. Cover the frying pan and cook for about 3 -5 minutes on each side. When a little darker then golden brown, flip it to the other side.

Serve with fruit, cinnamon sugar or eat it plain. It’s so good!

SONY DSC