Caramel Apples – A New Halloween Tradition in Our House!

SONY DSC

Although today is Halloween, we here in Ohio celebrated last night. It’s one of those midwest things I still don’t understand, like why my kids never get off school for Columbus Day when we live in Columbus, Ohio! Anyway, they call last night beggar’s night and I handed out over 125 pieces of candy, pretzels, lollipops, glow sticks and Twizzlers to more than 75 cutely dressed trick or treaters!

There are some traditions I have for myself on beggar’s night. I usually get my candy ready in a big black cauldron early in the day, pick up a pizza for dinner, make a pot of coffee and wait till 6pm arrives. That’s when the kids start coming and it doesn’t stop until 8pm when either the last little goblin shows up, or I run out of candy – whichever comes first! Last night I broke tradition. This was the first year my youngest son did not go trick or treating. It marked the end of  an era. This year, there was no pizza and no coffee. I didn’t even have my cauldren! However, there were caramel apples – plenty of caramel apples. A new Halloween tradition is born! Enjoy!

SONY DSC
No matter what you roll them in, they are delicious!

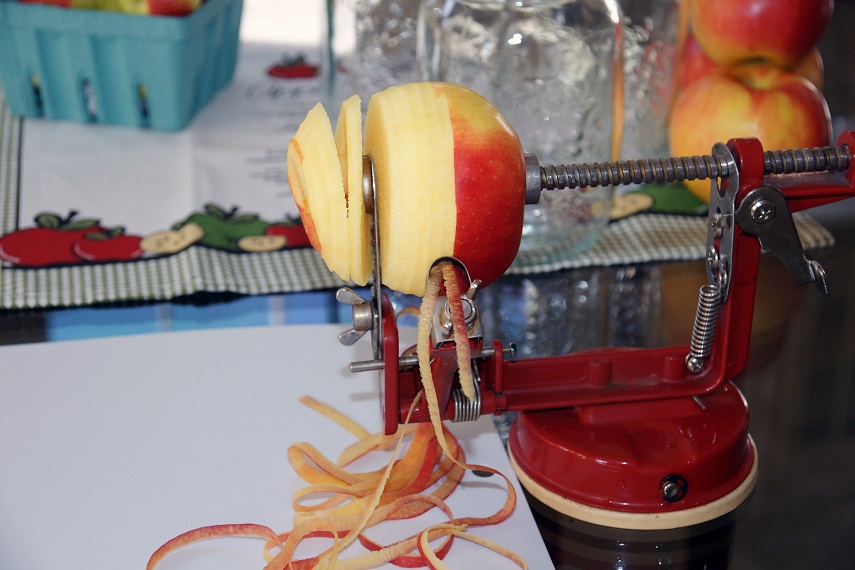
6 apples washed and dried well (I used a combination of Granny Smith and Empire) I find cold apples work best
1 pound of caramel (find a local candy making supply store to buy it in bulk so you don’t have to unwrap a million little caramels)
2 tablespoons milk
6 chopsticks
1 cup good quality melting chocolate, white or dark (optional)

Optional Toppings
Mini chocolate chips
Mini m&m’s
Chopped nuts (almonds, peanuts and pecans work very well)
Sprinkles
Crushed Heath bar candies
Crushed Oreo cookies
Sea Salt (this is especially good if you are into the salty caramel craze!)

Line a sheet pan with wax paper, spray it lightly with oil and set aside.

In the top of a double boiler, add the caramel and two tablespoons of milk. Bring the water in the bottom portion of the pot to a boil then lower the heat to a low simmer. It takes about 10 minutes or so to melt down – stir every couple of minutes.

While the caramel is melting, wash and dry the apples very well. Insert the pointy end of the chopstick into the center of the apple. I like to push it all the way down. If it’s too tough, use a rubber mallet to tap it in gently.

When the caramel is completely melted, stir it well then dip each apple in and twirl it around to coat the apple. Let the excess caramel drip off. I use a spare chopstick to take some of the caramel off of the bottom. Then set on the prepared pan. You have to work quickly with the caramel. Now on to decorating…

SONY DSC
You can use any size apple. I found these cute little apples at a local farmer’s market. They came out adorable!

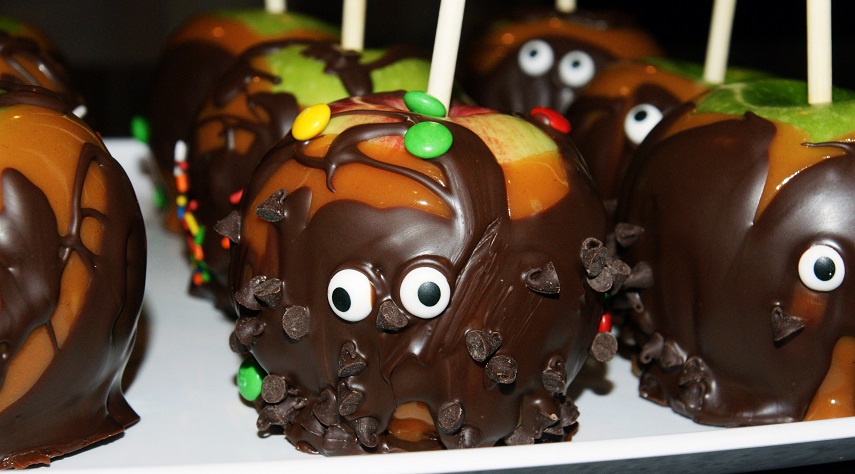
The apples can be made several ways. Just be sure to have fun with it, there is no wrong way to create a deliciously decorated caramel apple!

You can dip them in caramel refrigerate 30 minutes and eat.

You can dip them in caramel and immediately roll into the topping of your choice. Decorate with any combination of toppings while the caramel is still wet, then place in the refrigerator for 30 minutes to set – and enjoy. Decorate one apple at a time after dipping.

You can dip them in caramel then dip or drizzle them with chocolate and decorate with toppings. If you do this step, place the caramel apples in the fridge to set. While they are setting, melt about 1 cup of chocolate melts in a double boiler . You have to wait until the caramel is set before you dip them into the melted chocolate. This takes about 20 to 30 minutes. Then sprinkle or roll them into any topping you like.

Whatever method you choose, place them in the refrigerator for at least 30 minutes to set. They should be stored in the fridge if you’re not going to eat them right away and will stay fresh for a week or more. I found the best way to wrap them is individually in wax paper.* Cut a sheet that is about 12 x 14 or larger, depending on the size of your apple. Set the apple in the middle of the rectangle and gently bring each corner in towards the stick, then twist it to close around the stick.

*Fun fact, Thomas Edison is credited for inventing wax paper! How do you like that?

SONY DSC


It’s What We All Crave!

It’s out! The Columbus Crave Magazine’s 10 best restaurants!

SONY DSC

This week was the big reveal of the Crave 10. It’s the top 10 picks for the best Columbus restaurants in 2014. The event was held at the Refectory (one of the top 10) where they were serving some of their signature dishes. It’s obvious why they are a top 10 selection! Not only was the presentation beautiful, the food was absolutely delicious! Among my favorites were the mushroom profiteroles and warm spiced apple tartlets. Everything was cocktail size and I don’t usually refer to food as adorable, but the dessert was definitely that!

20141029_183752v2

If you haven’t picked up a copy, start with this issue! The magazine is quarterly and celebrates Central Ohio restaurants. If you live in Columbus, and are a culinary art enthusiast, foodie, food lover, Gourmand, or just like to eat out and try new and different restaurants, this magazine is for you! They share restaurant reviews, openings and closing, best spots for a first date, where to get the best ice cream, and all the great food trends happening in Columbus. Check their website for where you can pick up an issue – Enjoy!

Creamy Cauliflower Soup with no Cream!

There is a television show on PBS entitled America’s Test Kitchen. It’s filmed in a working test kitchen and is the home of Cook’s Illustrated Magazine. They have test cooks, food scientists, tasters and cookware specialists on the show. Every now and then I’ll catch an episode and find them doing something interesting whether it’s testing recipes, rating products, or trying out the newest kitchen gadget. When they create a recipe, they explain the science behind why it works or doesn’t work. Which is great especially when you try something out that is a total flop! I have gotten a few very good ideas on new tools and tricks when cooking, as well as recipes from the show like this creamy cauliflower soup.

SONY DSC

Their original recipe called for 1 and ½ sticks of butter – that’s 12 tablespoons of butter! So while they were very excited to have come up with a creamy soup that added no cream, it had plenty of butter to give it that creamy texture. That’s a lot of butter for a 2 pound head of cauliflower; it’s the equivalent of almost 2 to 3 tablespoons per serving! That’s way too much if you ask me.

It looked so simple and delicious, I decided to try it but with a Splash of Sherri! I used olive oil instead of butter and cut that way down. The result was a delicious tasting soup. One of the secrets to the soup’s flavor is cooking the cauliflower at different times. According to the show’s test kitchen, adding it in two stages gives a grassy flavor of just-cooked cauliflower and the sweeter, nuttier flavor of long-cooked cauliflower.

It was a real winner in my house, very simple, very quick, and a great new way to cook with cauliflower. So here is my version adapted from Cooks Illustrated. Enjoy!

1 head of cauliflower (approximately 2 pounds)
2 to 3 tablespoons light olive oil
1 leek, white and light green part only – washed very well and sliced thin
1 medium onion diced
1 ½ teaspoons salt
½ teaspoon white pepper (more or less to taste)
4 ½ to 5 cups water
3 or more tablespoons minced fresh chives
1 teaspoon of light olive oil (to sauté the reserved cup of florets)
1/2 teaspoon Sherry vinegar (cider vinegar works great as well)

This recipe serves 4 to 6

Pull off the outer leaves of the cauliflower and trim the stem. Use a paring knife and cut around the core to remove. Thinly slice the core and set aside. Separate it into core/stems, and florets. Reserve one cup of small ½” florets and set aside then cut the remaining cauliflower into ½ inch thick slices.

In a medium size pot sauté the sliced leek and diced onion in 3 tablespoons of olive oil. Sauté for 7 minutes until translucent then add stems, core and ½ the florets plus the 4 ½ cups of water. Bring it to a boil then lower the heat to a simmer for 15 minutes. After 15 minutes, add the rest of the cauliflower and cook another 15 minutes.

While the soup is cooking, brown the remaining 1 cup of florets in a tablespoon of olive oil over medium heat – stirring frequently. Sauté the cauliflower until golden brown; this takes about 5 to 10 minutes. When done, take the florets out with a slotted spoon, transfer to a small bowl and toss with the vinegar and season with a pinch of salt. Reserve the oil for a garnish or discard.

Puree the soup in a blender, food processor or use a stick blender until smooth (about a minute or two). Simmer the soup another couple of minutes on medium heat and adjust the consistency with more water as needed. The soup should have a thick, velvety texture. Season with salt and pepper to taste and serve with the browned florets, chives, and olive oil as a garnish.

Total cooking time should be no longer then 40 minutes. After that, the cauliflower will start to loose it’s flavor.

SONY DSC


One Kitchen Tool I can’t Live Without…

An Apple Peeler!

In a previous post, I mentioned how my son got us hooked on apple picking when he was in kindergarten. I wasn’t kidding when I told you he must have eaten 3 or 4 apples a day. I remember the proud expression on his face as he ate one of the apples he picked. I remember the enthusiasm in which he asked for apple after apple very clearly all these years later. I also remember how my hands hurt every night after peeling all of those apples.

Enter my new best friend in the kitchen… The APPLE PEELER

SONY DSC

I was shopping with a friend and telling her the apple story and how much my hands were starting to hurt. I said it laughingly, but it was true. While we were waiting in line, I happened to see the very apple peeler in the photo above. It was quite a coincidence. I didn’t think it would work very well and I figured it would be one of those things I’d end up returning. However, if what the package said was true, I’d be eating a spiraled apple in no time. In addition, it looked like a cool gadget and just like Meghan Trainor’s hit song… All About the Bass, I’m all about the cool kitchen gadget!

When I got home, I couldn’t wait to open the box and slice an apple. I placed the apple on the prongs, turned the handle a few times and voila, I had an apple sliced into rings like an accordion! It not only sliced the apple in even slices, it took the peel off* and cored it. It worked like a charm and was really very cool. I couldn’t wait for my son to get home from school, and see the magic!

SONY DSC

The bus pulled up, my son ran into the house, washed his hands, and asked for a snack. I sliced up an apple, put it on a plate and when he saw it, he couldn’t believe his eyes. The expression on his face was priceless. As he picked up the rings, he used two of them as eyeglasses to look through and called me the apples of his eyes!

That year I bought about 6 of them and gave them out as gifts as holiday presents, anniversary presents, as hostess gifts, if there was an occasion, you were getting an apple peeler. I think I even gave my son’s teacher one. An apple peeler for everyone! I purchased them at Bed, Bath & Beyond, but have also seen them in groceries, and sometimes TJ Maxx and HomeGoods.  It’s really a handy kitchen gadget. It makes life easier when making applesauce, or you can bake the rings and make apple chips.  I have even been known to use the slices to decorate an apple cake. If you decide to buy one, let me know how you like it. Enjoy!

*On a side note, you can leave the peel on the apple if you’d like, there is an option to do that.

SONY DSC